The first part of these instructions are valuable to provide context for the tester experience and requirements.
System Requirements
| Recommended Requirement | |
| Webcam | Required |
| PC |
Windows 10 & 11 ("S mode" and "SE" are not compatible) |
| Mac | MacOS 11 to 15.0+ |
| Chromebook |
LockDown Browser for Chromebook minimally requires the version of ChromeOS that Google makes available via their Long Term Support (LTS) channel. For more information, visit: https://chromereleases.googleblog.com/search/label/LTS Respondus recommends keeping your Chromebook updated to the most recent version that is available via Google’s ChromeOS “Stable” channel: https://chromereleases.googleblog.com/search/label/stable |
| Internet Download Speed | 6 Mbps |
| Memory | 4 GB RAM |
| Hard Disk Space | Windows: 300 MB of free hard disk space Mac: 400 MB of free hard disk space |
System Check
Before launching the test, testers can run a System Check, to verify audio and camera are operating correctly.
Click on the Profile image in the upper right corner and select System Check.

Select your audio and video devices and click Test.

When the audio and video have been verified, you will be able to select Next to see information about your operating system, browser and run a connection speed test.
Lockdown Browser Instructions
The Lockdown Browser is a client application that must be installed to a local computer before an exam will launch.
- Select Download for Windows, Download for Mac, or Chromebook Extension based on your testing device.

- The file will be saved to your default download directory. Once downloaded, execute the installation file.

- When prompted to allow the app to make changes to your device, select Yes.

- When the Lockdown Browser installation is complete, testers will return to the Instruction page and select Start! to begin the test.

Starting the Test
After clicking the Start! button to begin the test you will receive a pop-up message about the Lockdown browser:
- Select Open Lockdown Browser OEM when the pop-up message appears


You will be asked if you want to allow this app to make changes to your device, select Yes
- The lockdown browser will load and prompt you to close any open programs. Click Close Process for each program. If you are running on battery power you will receive a warning, if possible, have your device attached to a power source while taking the test.

-
Once you have closed all the open processes, select Start.

Configuring Administrations
Within the Administration Configuration section, there are two key settings for proctoring. Select Administrations>Dashboard>+New Administration or Administrations>Dashboard and select a previously created test and the Edit Administration option within the Action buttons to the right of the test name.
- AI Proctoring Only LifeJourney products that include AI Proctoring as part of the offering will have this field checked. If the product purchased does not include AI Proctoring and it is something you would like to consider, please contact Customer Success.
- AI Proctors is only available to select if an AI proctored test has been purchased. Select from the available proctors in the drop-down menu to assign them to an Administration.

NOTE: Prior to assigning proctors to an administration, from Platform Settings > Issuers enable AI Proctor for everyone as needed.

Proctoring Administrations
- Once the Administration is created, there are administration management options. To manage an administration, go to Administration > Dashboard, and select a function from the Actions column.

- View details – displays information about the Administration configuration.
- Edit administration– access to edit the Administration name, dates, and configurations.
- View students – provides an up-to-date view of the Learner status in the Administration and access to Learner-level reports as they complete the test.
- Reports – access to Administration-level CSV and PDF reports.
- AI Proctoring – area for proctors to check Learner testing anomalies, and view and clear any issues with Learner identification flagged by the AI system. This button will only appear for Learners that are flagged for proctoring-related issues.
- Accommodation options - configure individual accessibility settings.
Clicking on Show under the ID Validation column will display the individual’s image and ID.

Review the presented information. Add your required comments before selecting Approve validation or Reject validation.
The tester will receive an email stating approve, reject, and the comment as it was entered.

- The ID Validation Report can be generated at any time and shows the Proctor who approved or rejected the ID validation, the reason, time of processing the request.

- At the institutional level, there is an optional setting available under Platform Settings > Personalization for Automated ID Name Matching. When enabled, this feature compares the tester's registered name with the name on the ID scanned during the ID validation process. If there is a discrepancy between the two names, the individual will be flagged for further human validation.

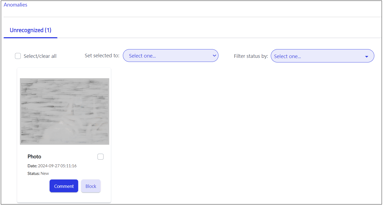
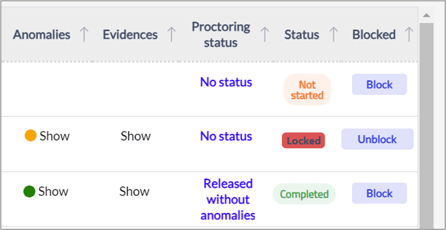
- As individuals progress through the test, anomalies can occur. For an overview of the type and number of anomalies occurring, from the AI Proctor's List, select Check Anomalies. The Anomalies column shows the status of anomalies as either green (0), orange (1-4), or red (5+). Click on Show to view anomalies as categorized by: Unrecognized, Suspicious Object, or Accompanied.

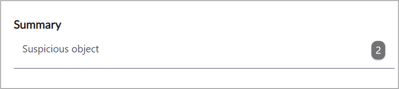
- An overview will be posted showing the Summary of the anomaly types and the quantity. Each of those items can be reviewed and commented on. Based on the anomaly, the tester can be Blocked from completing the test.
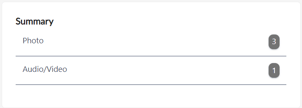
- In the Evidences column, you will find the audio and video being captured for the entire test. These can be reviewed by the Proctors during the test or as a post-test follow-up. Each item can be commented on and potentially Block or Unblock a test.

- If a tester is blocked they will receive a pop-up message stating they have been blocked and includes the Comment entered. When the testers select Accept, they are exited from the test, and the Lockdown Browser is closed.

- Proctors will utilize the Proctoring Status to release individual tests to be scored. There are four (4) status options to select from:
- Released without anomalies
- Release with anomalies
- Change from without anomalies to with anomalies
- Change from with anomalies to without anomalies
Types of Anomalies
Each anomaly will include evidence that can be viewed by the Administrator or Proctor.
|
Anomaly |
Definition |
|
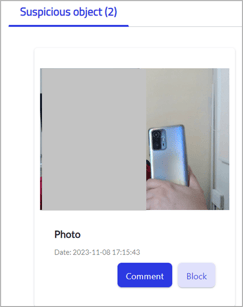
Suspicious object |
A foreign object(s) that should not appear in the camera frame: cell phones, calculators, books, and other various objects. |
|
Not detected |
The tester’s face is no longer visible in the camera frame. |
|
Unrecognized |
The user’s image cannot be analyzed, the person has their head lowered or moving around, wearing glasses or does not match the person in the initial image. |
|
Accompanied |
This can occur when the system detects other faces that may be pictures or other individuals in the camera frame. |
Recorded Evidence
The following pieces of evidence are recorded continuously during testing.
|
Item |
Information |
|
Recognized |
The image is captured at regular intervals and compared to the picture taken of the tester during ID validation. |
|
Audio/Video recording |
Continual audio/video recording of student and saved in 2-minute intervals. |